Once Variant Types/Options have been created (and if required, Default Variant Types configured), Variant Stock Items can be created.
The process for creating Variant Stock Items is outlined as follows:
Note!
The creation of Variant Items is not supported on Site Management terminals.
Variant Items must be created at the Head Office for any Site Management terminals.
Note!
Each Stock Item can only be linked to a maximum of three Variant Types (e.g. Colour, Size, Material).
To skip to a particular point in the Variant creation process, click on one of the following links:
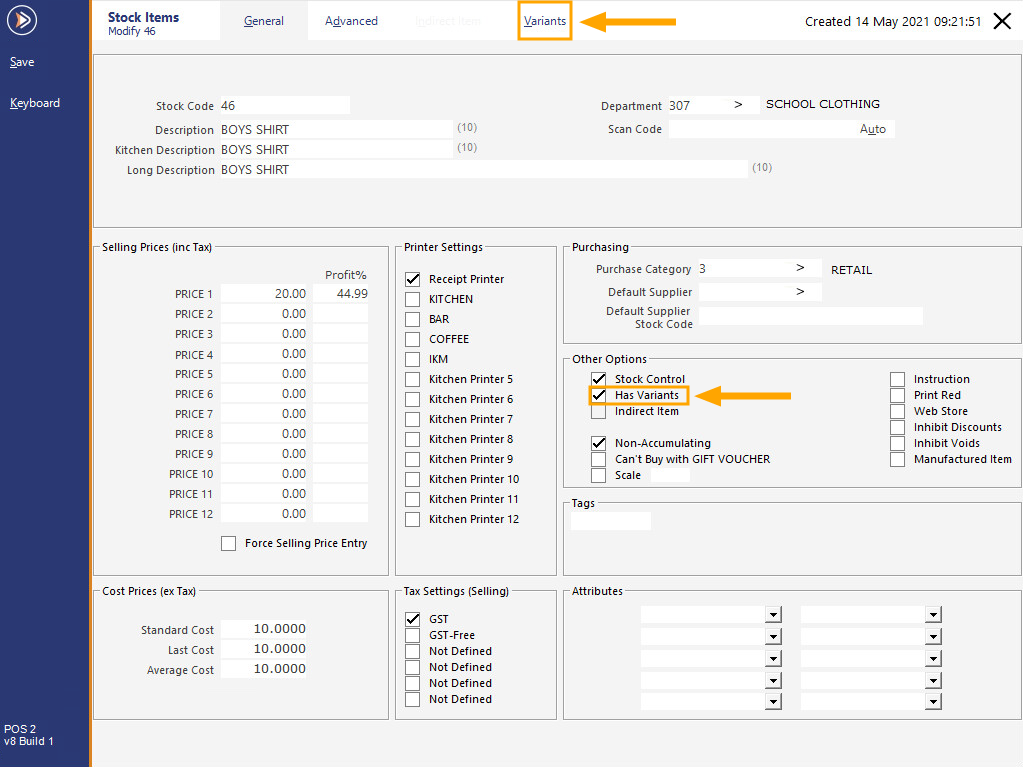
Use an existing Stock Item which is a non-Indirect Item (or create a new non-Indirect Stock Item).
This item will be the main item (or parent item) that all the child Variant Stock Items will be linked to.
Enable the "Has Variants" checkbox.
When "Has Variants" is enabled, the Variants tab will become accessible.
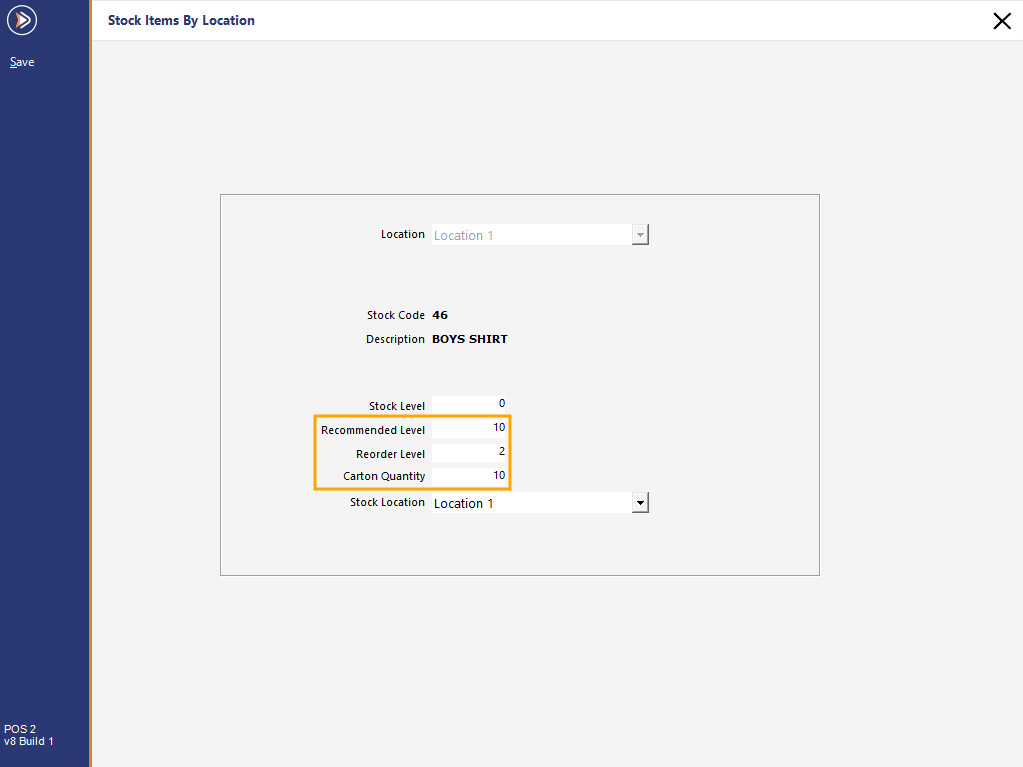
If each of your Variant Items will have the same Recommended Level, Reorder Level and Carton Quantity, it is a good idea to enter these details into the Parent Item.
This way, Idealpos will replicate these values to each of the child items, saving you from having to enter these details repeatedly for each child item.
Go to the Advanced tab of the item, then next to the Stock Level field, press the ">>>" button.
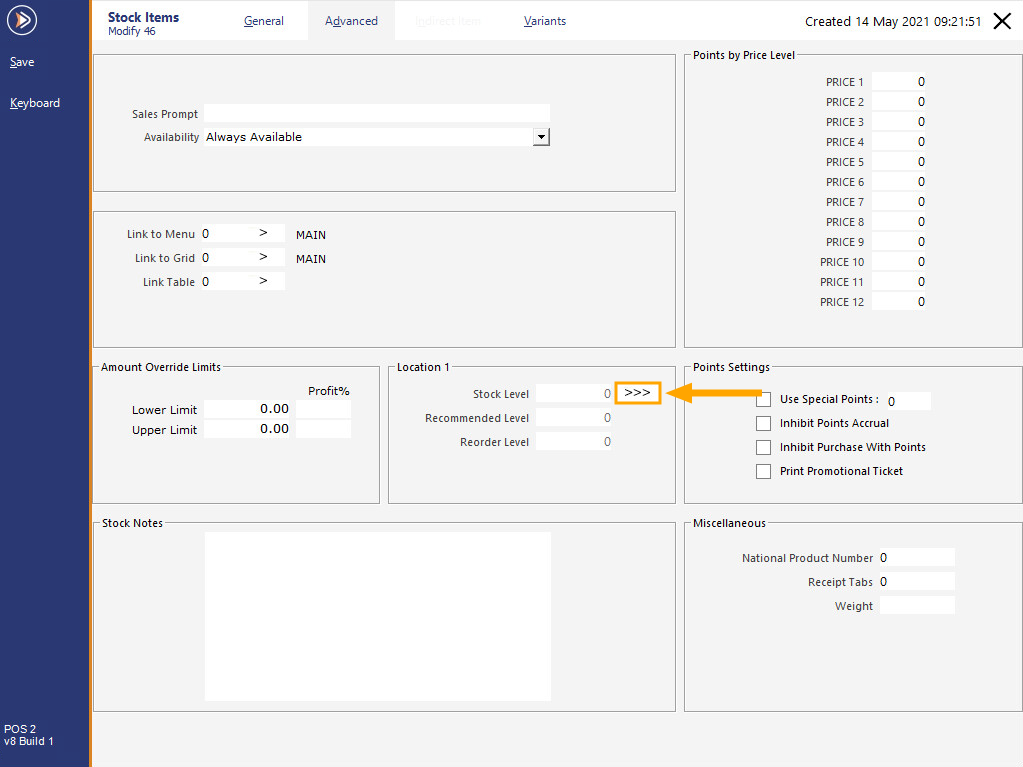
Enter the Recommended Level, Reorder Level and Carton Quantity and save the change by pressing the Save button on the top-left corner.
These values will be replicated down to each of the child variant items when they're created via the Variants tab.
To create the Variant Stock Items, navigate to the Variants tab.
The left-hand side of the Variants tab will contain three drop-down boxes evenly separated down the screen.
Each drop-down box represents a Variant Type.
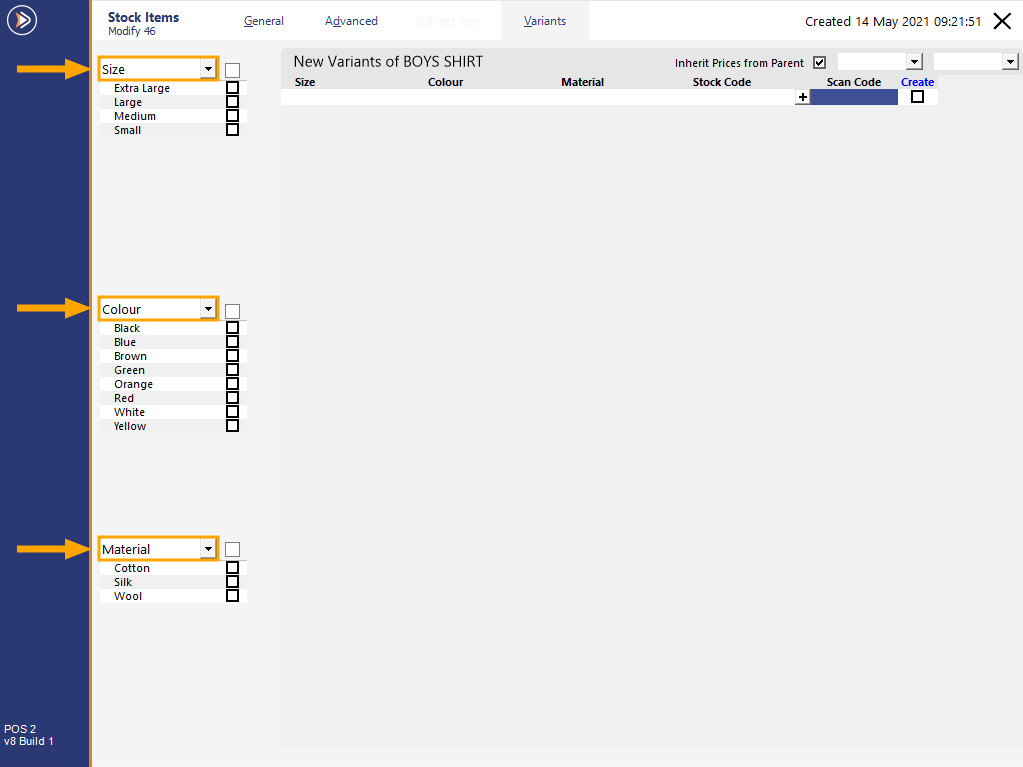
If the Default Variant Types have been configured in Global Options > Other Options > Default Variant Types, these Variant Type drop-down boxes will be pre-populated on the left-hand side of the window, similar to the example shown below.
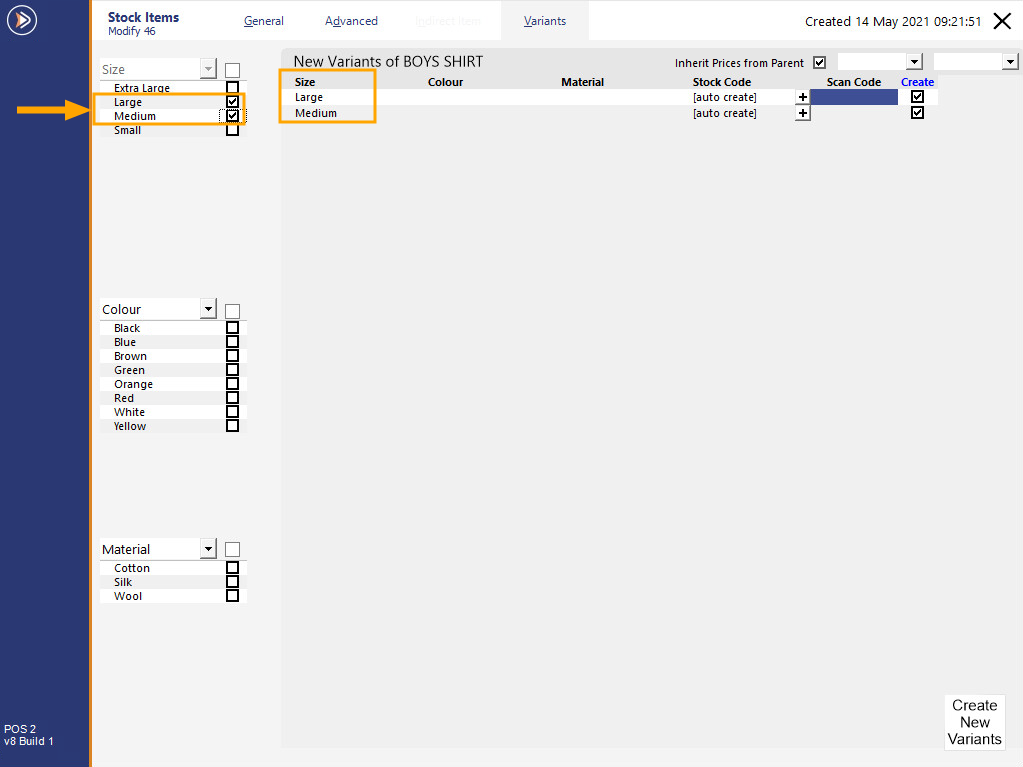
Below each Variant Type dropdown box will be a list of Variant Options that are available for the selected Variant Type and each option will contain a checkbox.
Only enabling selected variant option checkboxes will result in only the enabled variants being marked for creation.

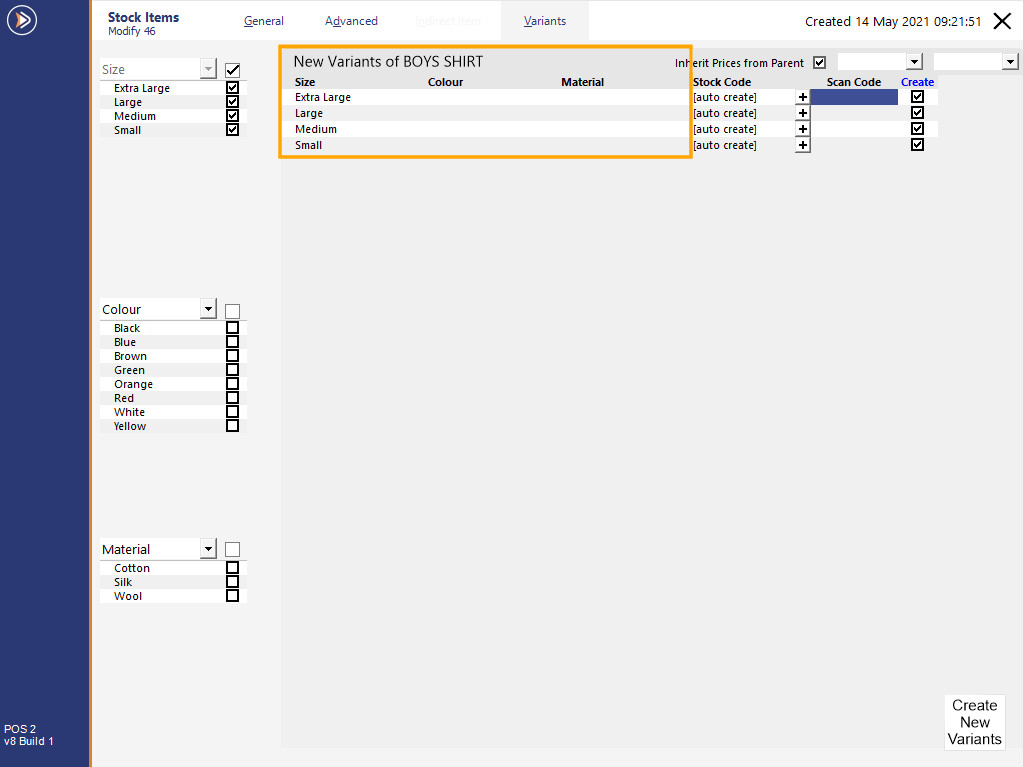
Enabling a checkbox next to a Variant Type drop-down box will enable all the Variant Options available for the Variant Type and these items will be displayed on the right-hand side of the window as items that are pending creation.
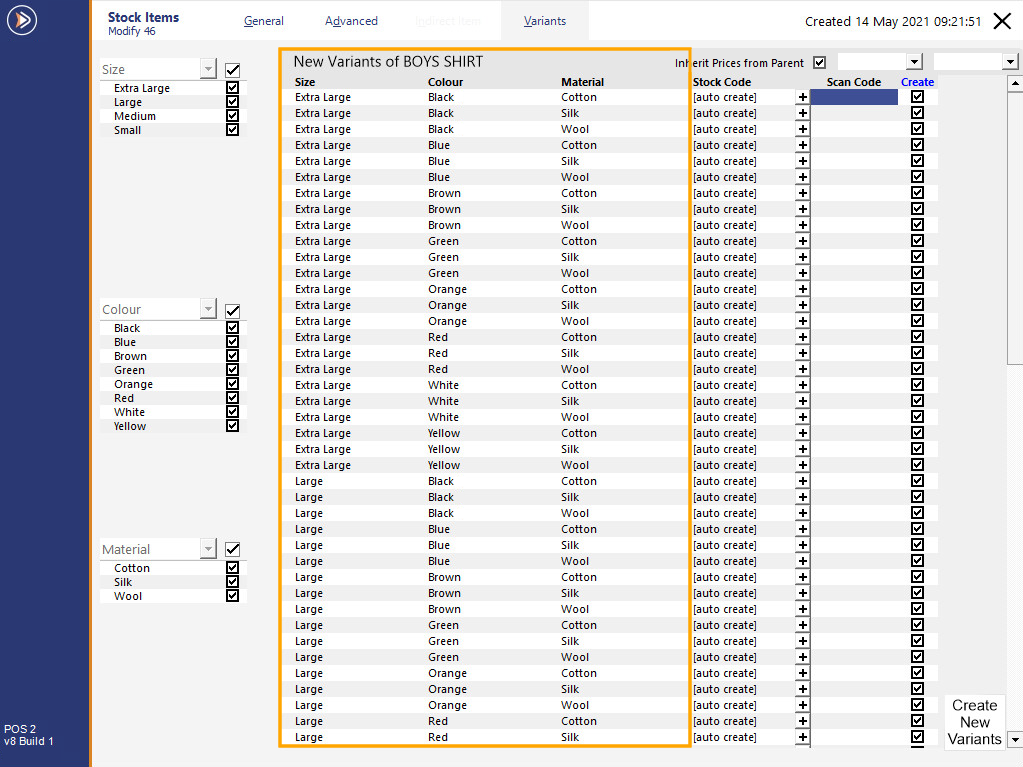
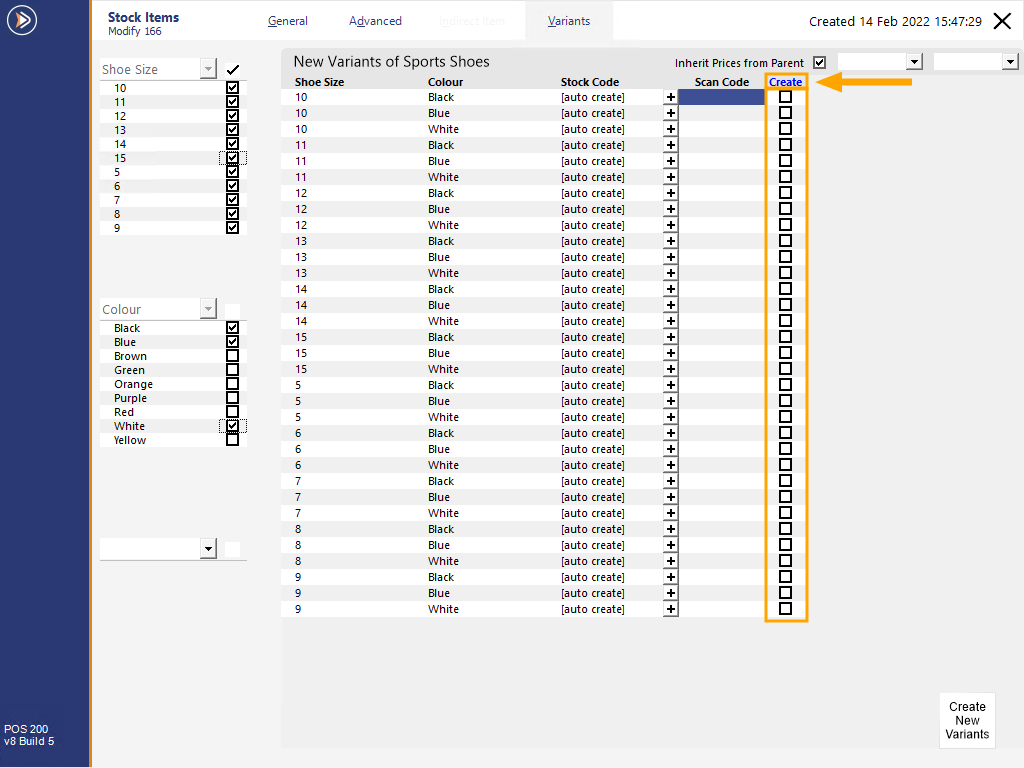
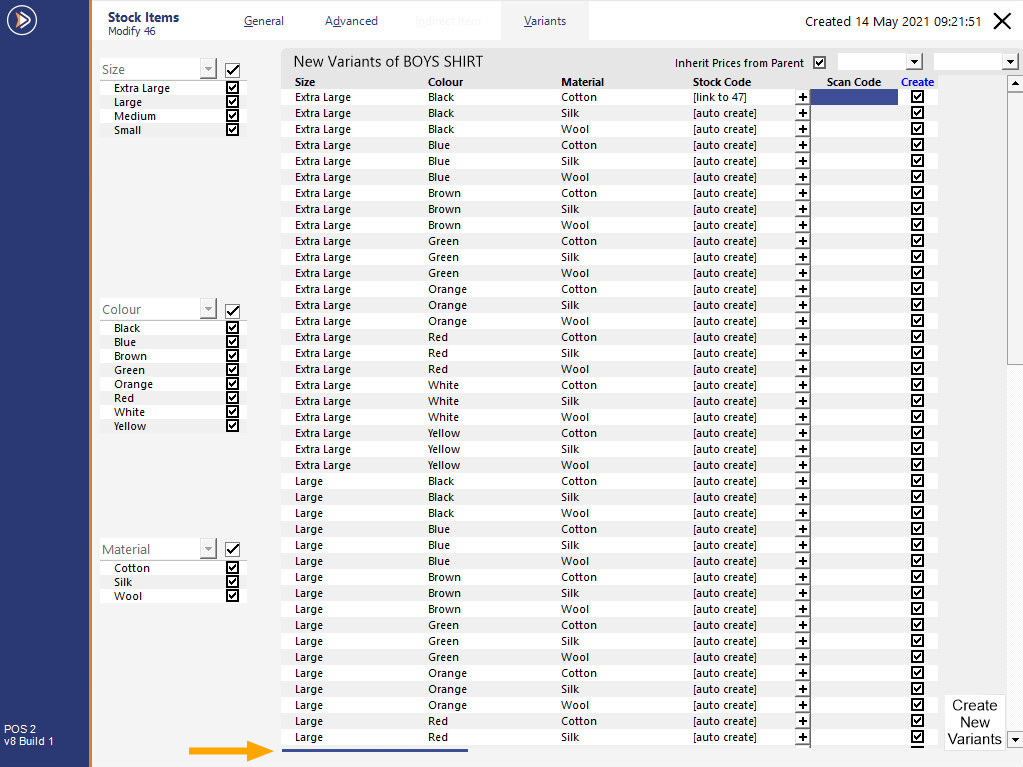
When Variant Options have been enabled, a preview showing the Stock Items that will be created will appear below the heading New Variants of [Base Stock Item Name].
These consist of all the various combinations that are available for the enabled Variant Options
If you want to exclude one or more of Variant Stock Items from being created, untick the checkbox in the "Create" column next to the Variant.
This will prevent those particular Variant combinations from being created.
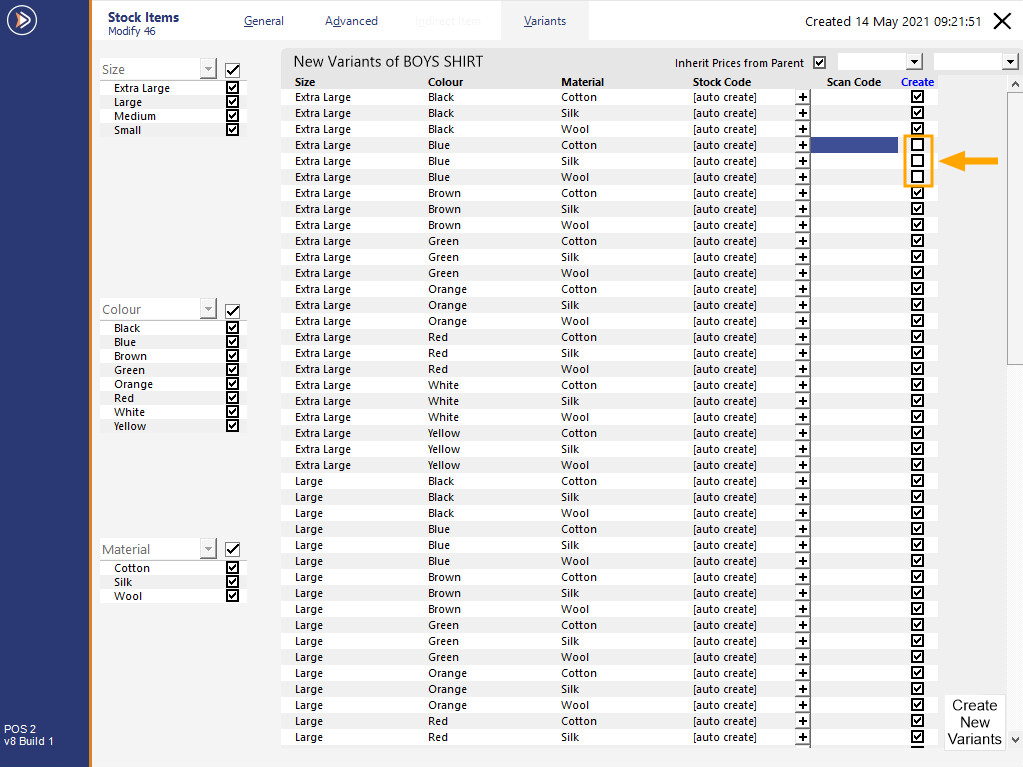
If you want to either bulk-select or bulk-unselect the Create checkbox, click on the blue "Create" column header.
This will either bulk-select or bulk-unselect all Create checkboxes.

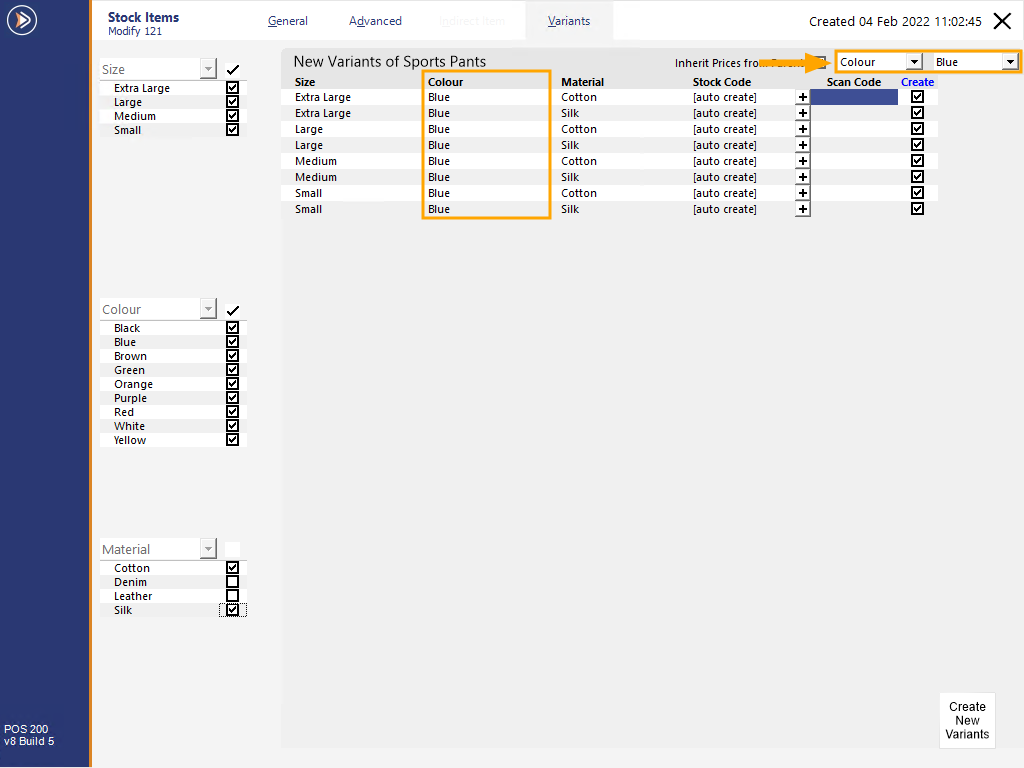
If the total number of New Variants that will be created becomes overwhelming or too long, you may want to filter the New Variants list.
The filter function can be used to create smaller batches of New Variants at a time.
Note that the filter is designed for you to filter the list of items as required > Create New Variants > Repeat Filtering as required.
You cannot filter the list of New Variants, make changes to the list of items shown, then modify the filter again.
If you want to change the filter once you have made changes to the New Variants (e.g. Add a Scan Code, toggle which Variants you want to create via the Create checkbox, change Sell Price 1, etc.), you will either need to Create those filtered Variants first via the "Create New Variants" button, or you will need to Reset the filter, which will cause any changes you have made to those uncreated Variants to be cleared.
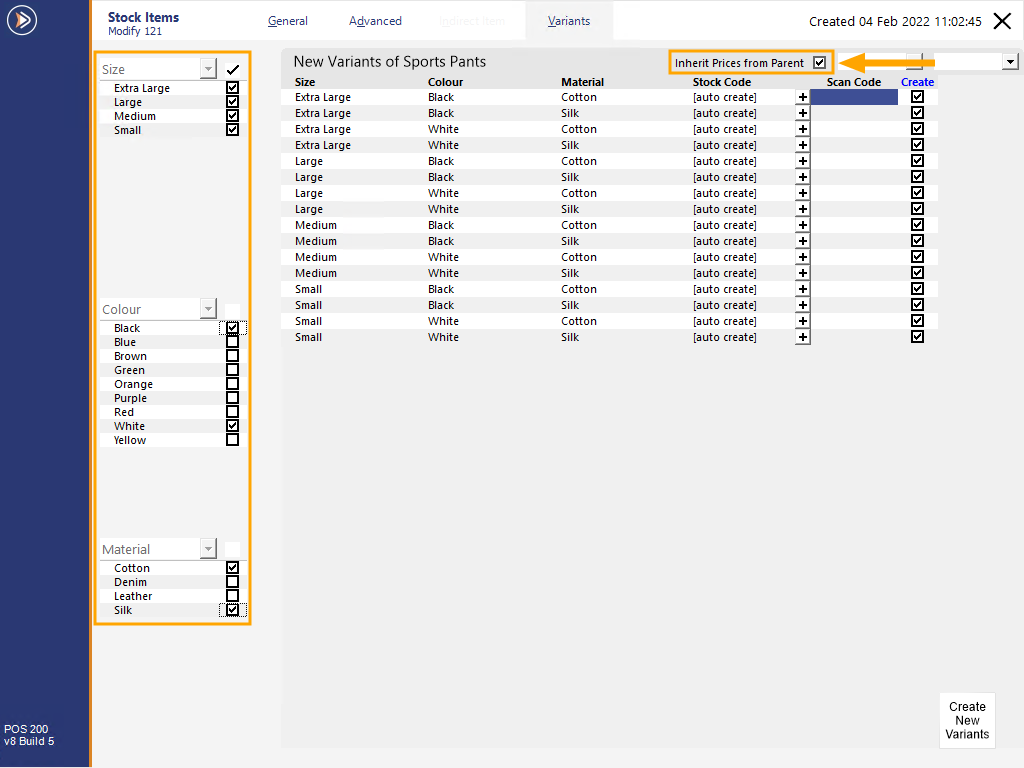
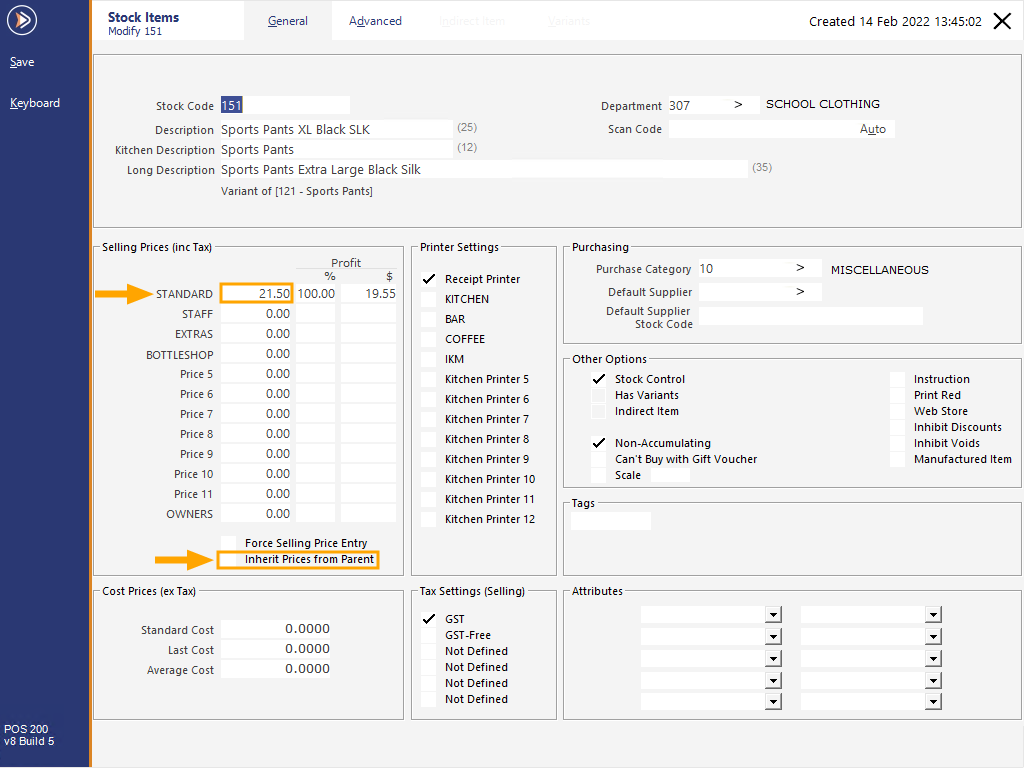
When creating Variant Items, the newly created Variant Items can either Inherit Prices from Parent, or they can have a custom Sell Price entered.
This is controlled via the "Inherit Prices from Parent" checkbox during the Variant Item creation process.
When "Inherit Prices from Parent" is enabled, the Sell Price 1 column is not visible and Variant Items created will inherit their Sell Prices from Parent 1.
If the "Inherit Prices from Parent" checkbox is unticked, a Price 1 column will become visible and the values shown in this column will default to the value entered into the Price 1 from the Parent Item.

The Sell Prices of each Variant Item can then be adjusted by clicking into the Price 1 field and modified as required.
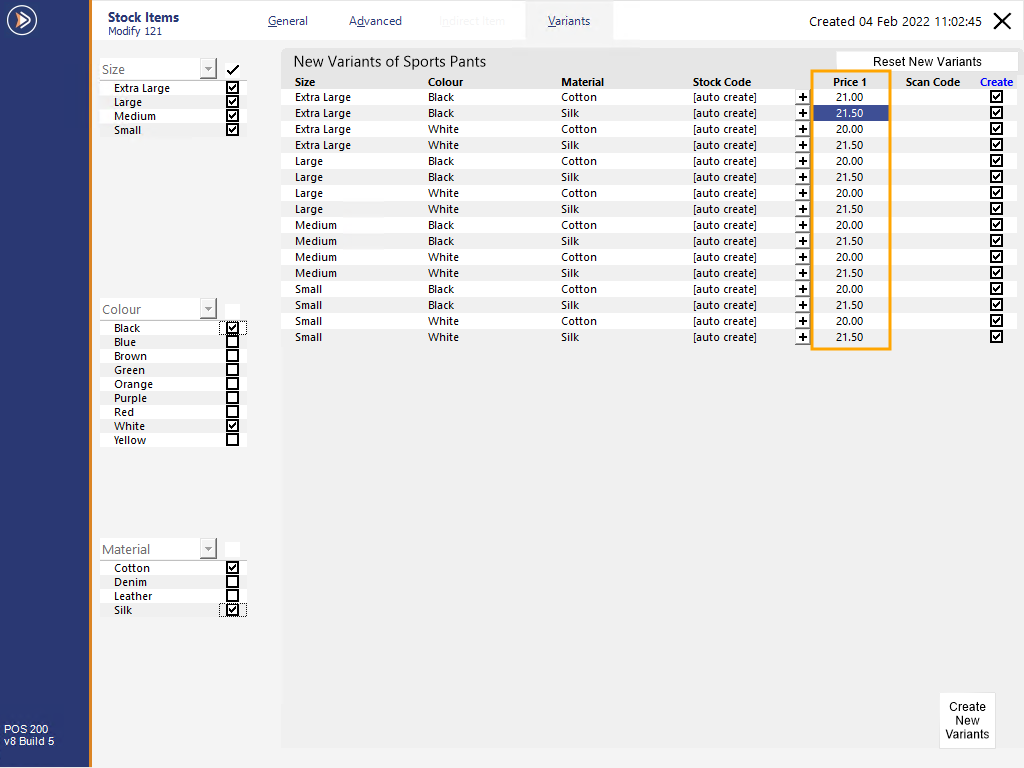
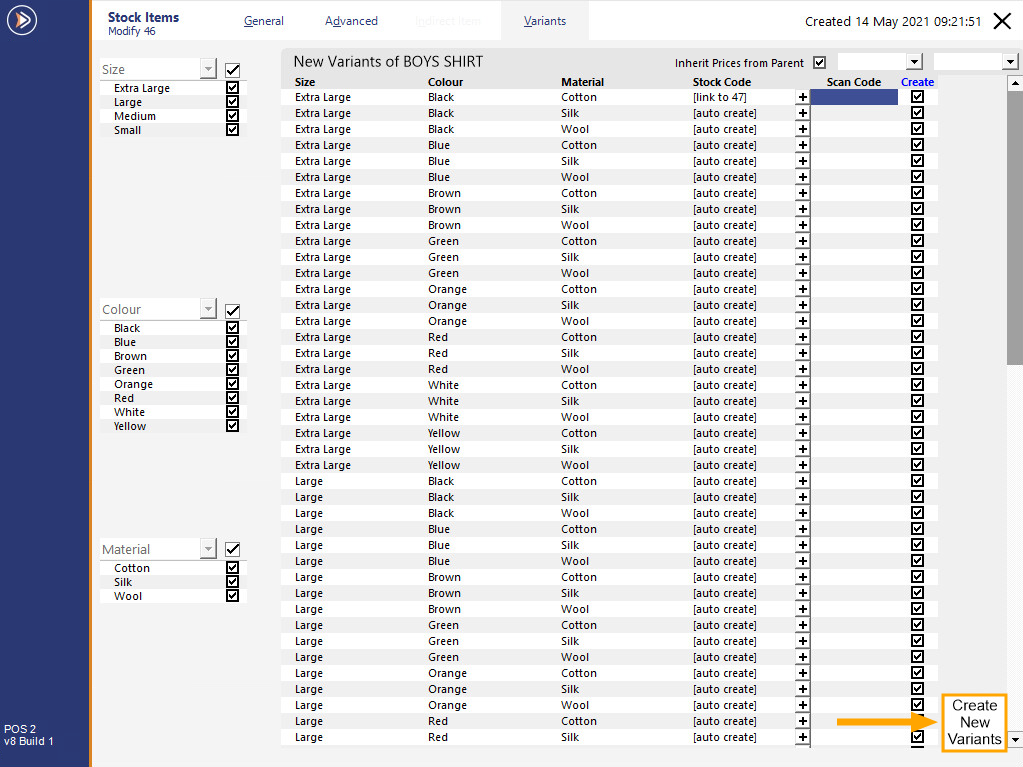
The Variants can then be created by pressing the "Create New Variants" button on the bottom-right corner of the window.

Each Variant Item created as part of this process will contain a Level 1 Sell Price as entered during the Variant Item creation process listed above and will also have the "Inherit Prices from Parent" checkbox unticked.
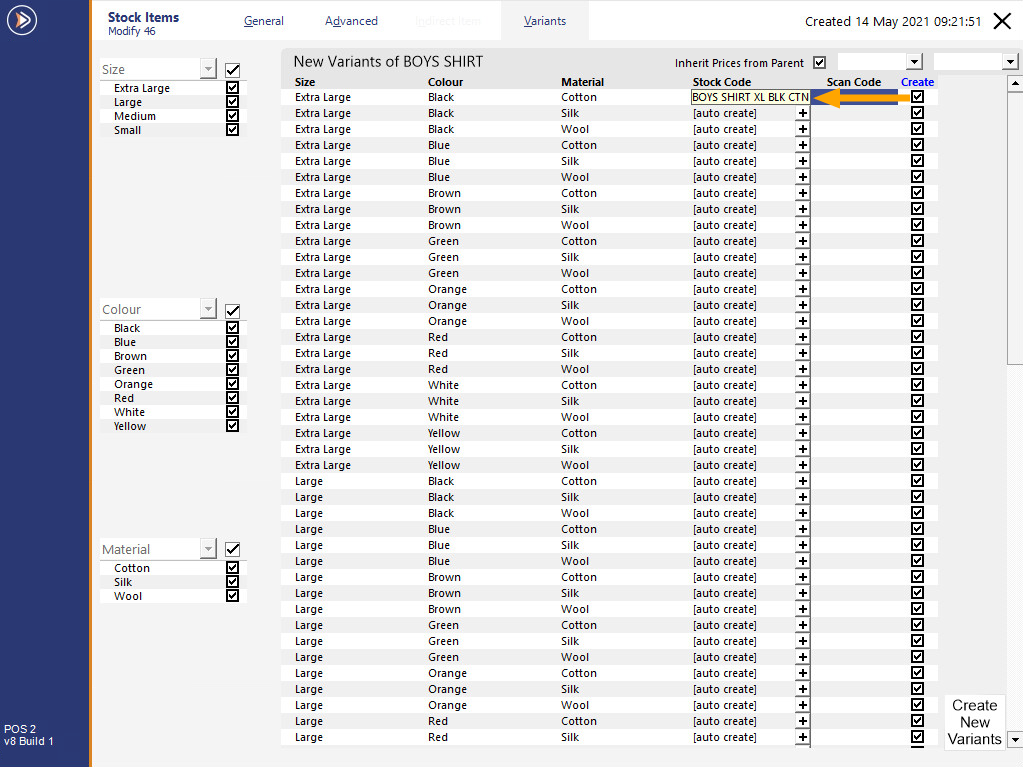
If you want to link a Variant to an existing Stock Item, press the "+" button located in the Stock Code column.
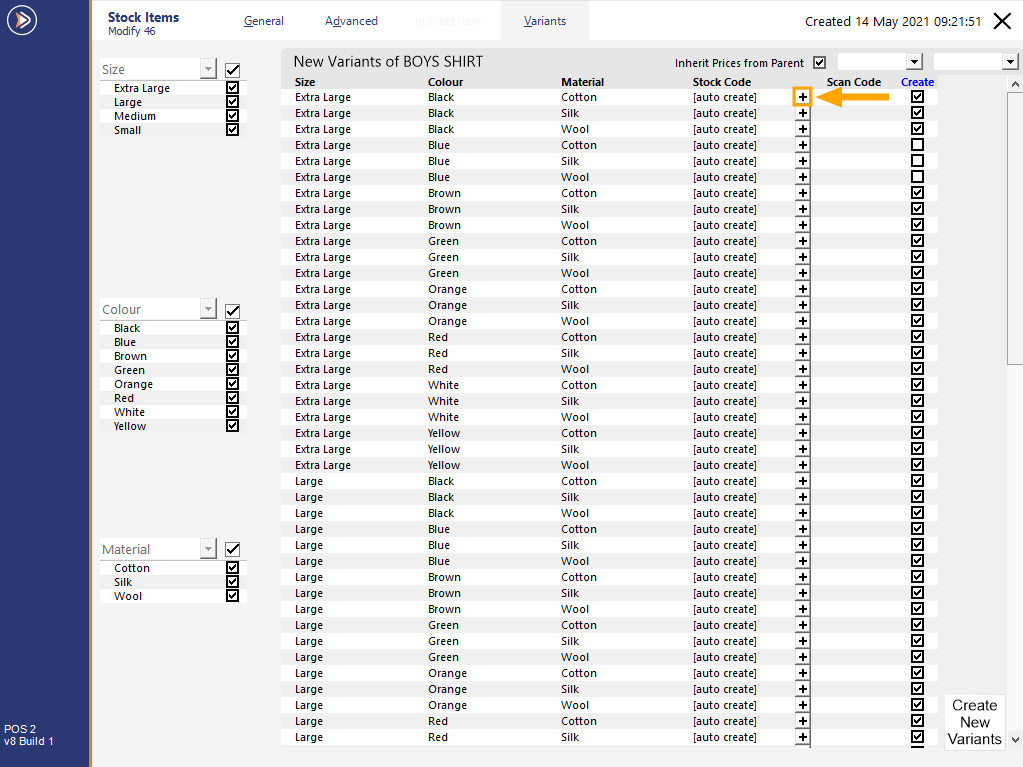
This will display a prompt "Would you like to Create a Variant by linking an existing Stock Item?".
Press Yes to continue.

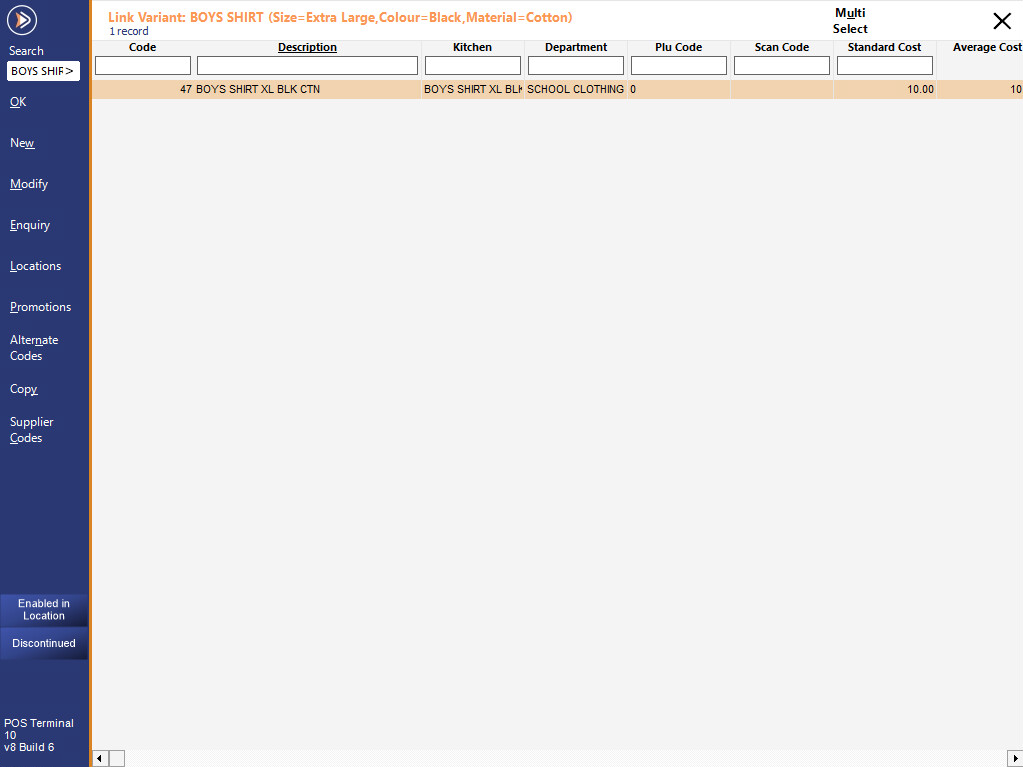
The Link Variant screen will be displayed. This screen can be used to search for and select a Stock Item to link to.
To facilitate the linking process, the Parent Stock Item's Description will be pre-populated in the Search field (top-left corner of the window) which will narrow down the search results.
The details of the Variant (options for the Variant Item being linked) will also be displayed in orange font at the top of the Link Variant window.
From the list of items, search for the Item that you want to link to then either double click the item to link to it, or click on the item once to select it, then press the OK button on the top left-hand side of the window.
Once an existing Stock Item has been linked to the Variant, its Stock Code will be shown in the Stock Code column.
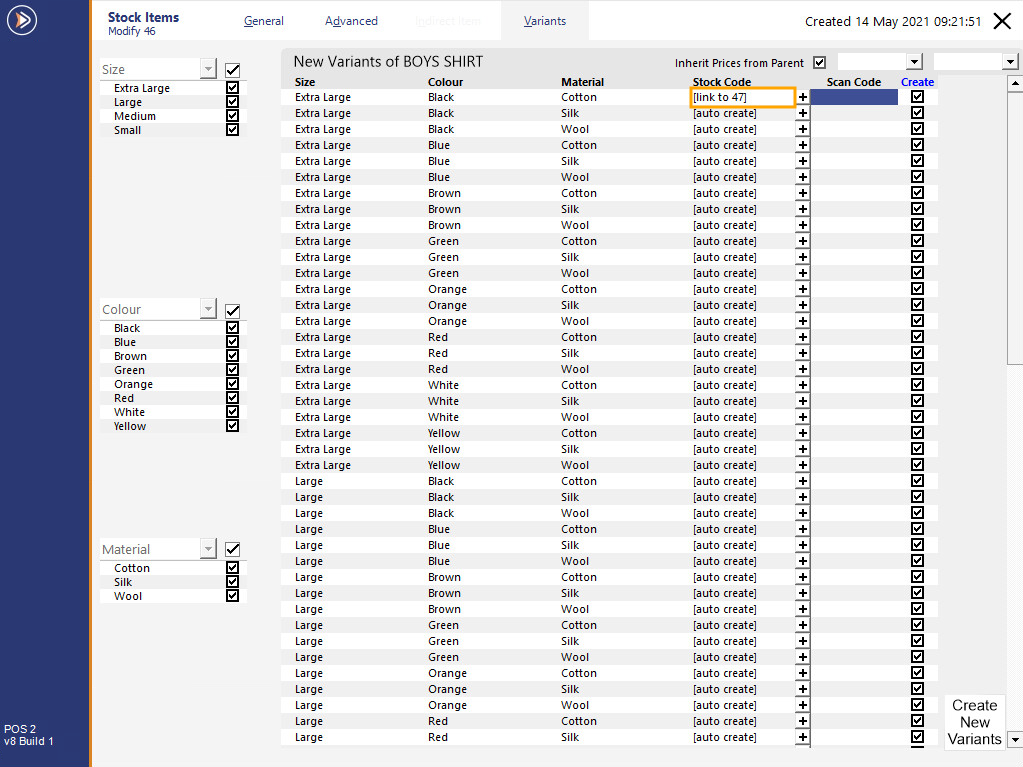
Should you need to see the description of the linked Stock Item, you can hover over the mouse cursor over the Stock Code field and the Stock Item's description will be displayed.
Once you're ready to create the Variants shown under the "New Variants of" heading, press the "Create New Variants" button located on the bottom-right corner of the window.
A prompt indicating the number of variants that will be created will be shown - You are about to create # Variants of [Base Stock Item Description]. Are you sure you wish to proceed?
Press "Yes" to continue with the creation of the Variant Stock Items.

Depending on the number of Variant Items that Idealpos needs to create, this process may take some time - a progress bar will be displayed to show that Idealpos is currently progressing through the creation of the items.
Once the Variant Items have been created, a prompt will be displayed to confirm the successful creation of the Variant Items.